Two fellow martini drinkers taught me to appreciate a classic Bombay Gin martini -- the gin had to come straight from the freezer. Oh so dry. Two olives and an onion..... So when it came to creating pumpkin martinis, I needed something that would appeal to me as I'm just not into sweet drinks.
After much experimentation, here it is. This is good, if I do say so myself. And I think it will appeal to any classic martini drinker.
The proportions are really important in this drink. You can scale it up, but keep the proportions the same. The balance is what makes it work.
You could also use Lagavulin Scotch, but you might want just a wee bit more. It is the smokiness we're after here, so you need one of the heavier smokey, peaty Islay malts.
So good.....
One variation I'm going to try is the same basic recipe but instead of gin, I'm going to try the vodka from Dry Fly Distillery. I'm not a normally a vodka fan, but Dry Fly's is really good and I think it will work great in this drink.
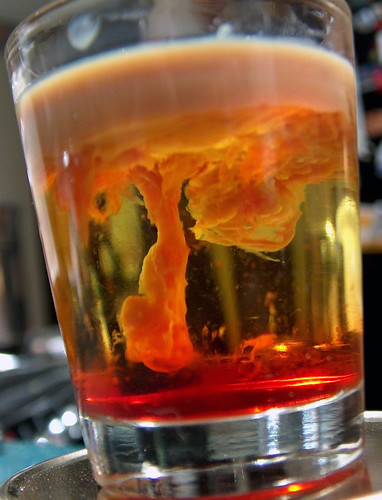
This pumpkin martini is the over-the-top, frou-frou, big, bold, seasonal martini. If you like sweet martinis, this is the one. If you prefer a classic, gin or vodka, dry martini, hold out for the next recipe that I call the Subtle Pumpkin Martini.
Several friends have said, "this is the best martini I've ever had." I'm not sure why pumpkin liqueur lends itself to martinis so well, but who am I to argue. Without further ado, here is the recipe:
Before mixing this up, prepare your martini glasses with a rim of cinnamon/sugar mixture. Premix some ground cinnamon with sugar, pour a few drops of cinnamon liqueur into the glass, and turn the glass partially upside down while rotating to wet the complete rim of the glass. Then dip the rim into the cinnamon/sugar mixture.
Pour the above ingredients into a cocktail shaker with ice, shake well, and pour into your prepped martini glass. Toss in several candy corns for garnish.
Several years ago, I decided to gin up (haha) some pumpkin martinis. I scoured the Internets for recipes and found several possibilities. The key ingredient was always Bols Pumpkin Smash Liqueur. Promptly after I tried these recipes, refined a few, then created a new one, the Bols Pumpkin Liqueur vanished. I got the last couple of bottles in my state run Washington supply and that was it.
I couldn't find any replacement so I decided to make my own. I searched again for liqueur recipes, bought a book called Classic Liqueurs for reference, then crafted up a plan to try variations of ingredients in a series of experiments. Each generation was split into 4 batch variations, initially focusing on the pumpkin flavoring. What I discovered along the way is that pumpkin by itself tastes like squash -- go figure. What we really think of as "pumpkin" is the spices that go along with the pumpkin. So it is better to call this Pumpkin Spice Liqueur.
By the 3rd generation I was making good progress. I kept plying everyone around me with tastings, and I finally settled in on a recipe. It came out similar to Bols, but I like to think it tastes better. More flavoring (from actual pumpkin and spices) and not so sweet. Slightly
higher alcohol content as well.
So here is the result from all my experiments, the recipe for pumpkin (spice) liqueur. I still tweak it a little each time, but this is where it stands now.
Ingredients:
Monarch 100 Proof Vodka - 1.75 litre
Libby's Easy Pumpkin Pie Mix - 30oz can (This worked the best -- really!)
8 Cinnamon Sticks
4 1/2 vanilla beans (split) or about 3 TBLS (close to an ounce) of Vanilla
10 whole allspice
10 whole cloves
1 tsp ground ginger
1/2 tsp ground fresh nutmeg
(syrup)
4 1/2 Cups Sugar
6 cups water
(Finish)
3 tsp food grade glycerin (Beer supply outlets have this)
Coloring - I use Heritage Farm Food Colors
35 total drops color (28 yellow, 7 red)
You'll need a BIG jar. I use a big pickling jar (sorry don't know the size here). Clean and sterilize the jar and lid really well. Then toss in all the ingredients in the first part of the list. Stir/shake it around to mix well, it will look pretty disgusting. Close up the jar and put it in a cool area to steep for two weeks. Stir/shake it every couple of days.
After two weeks, we strain the concoction through a filter bag. I got mine from a beer supply place, not too fine at this point. I also clean the cinnamon sticks but toss them back in for the final phase. At this time, we also make and add the syrup. Put the sugar and water in a large pan and heat to boiling, stirring constantly. Let cool. Pour the syrup into the big jar and stir it up. Close it back up and put it back in the dark/cool location for three more weeks. Once again, stir/shake occasionally.
After the 3 weeks, it is time to filter, finish, and bottle the liqueur. Filtering is tough. The Bols liqueur had a nice orange crystal clear look that I can't quite achieve. My current method is to use a gold coffee filter with extra paper coffee filters in it. This takes quite a while and you'll use many paper coffee filters before you are done. But it comes out nice when complete.
The final finishing step is to add the glycerin, and the orange coloring. Then find some nice bottles to put your finished product in. The final proof should be somewhere around the neighborhood of 24% alcohol by volume or about 48 Proof.
I was running low this year so I recently started a new batch (4 weeks to go and counting.) I had been searching the Internets again and happened to search for pumpkin liqueur....guess what, there is a new one on the market. So if you don't want to go to all the trouble, you can head to your favorite libation source and buy Hiram Walkers Pumpkin Spice Liqueur. They are apparently going to make this available on a seasonal basis. I picked one up to give it a try. I have to say that I'm not too impressed. It has an overwhelming nose and flavor of caramel that I can't get past. The Bols version had better flavor, but it was over-the-top sweet. I think mine is somewhere between these two. But now that you have the recipe, you can tweak it to your own preferences.
My martini recipes will be coming up soon in another post. I have three martini recipes, though I focus on two, the frou-frou over-the-top sweet stylish pumpkin martini, and my personal favorite, what I call the Subtle Pumpkin Martini. Stay tuned....
First, I'm not quite sure how I ended up making a tentacle, I just got sucked into this project bit-by-bit until it consumed me. I had thought about making a big tentacle at one time, but it seemed a daunting project. Then I saw this off-the-shelf tentacle prop from FrightProps. I don't buy too many off-the-shelf props, but this was really well done, as is their octopus. The tentacle is about 5 1/2 feet long and is foam filled. The foam in the first one was pretty stiff. I've since bought a second, and the foam is now very flexible.
I still wasn't planning on making a tentacle prop but then I saw these two air-muscle instructables (one and two). I've never been a fan of pneumatics for props, too jerky, "digital", and *loud* hissing air. (Okay, one major exception has been the high-end prop boyz like ScareFactory. They have several amazing pneumatic props that have terrific motion and no extraneous noise.) But the air-muscles appealed to me as they had an organic look and feel and appeared inexpensive to produce. I found local parts and made a prototype, and I was hooked. The air-muscles deserve a post of their own, so I'll skip the detail for now.
The air-muscles would give life to the tentacle making it capable of some complex motions, I was hoping much like a cat tail. But the tentacle couldn't just sit there, it had to start hidden and emerge its entire length. It also needed a lift mechanism to enable up and down motion. I didn't think it would need left/right motion, that would come from the tentacle itself. I originally envisioned 8 muscles in the tentacle, 4 in the base, and 4 in the "finger" as I came to call it. Gravity proved a major difficulty so I ended up leaving out the down actuator in the base, for a final count of 7 air-muscles inside the tentacle. Then I would need two typical air cylinders, one for the forward/back motion, and one for up/down. I imagined the up/down to be straightforward, but the forward/back was going to be difficult as I needed 6 feet of linear travel. I worked through a variety of possible solutions but thought the classic scissor would work best given my budget.
Seven air-muscles and 2 air cylinders meant I needed 9 total air valves. Again I had no previous pneumatic experience but knew I didn't want 9 individual valves. I spent a lot of time researching the options. Solenoid valves (and all the myriad connections) get expensive quick. There are so many variations on valve types I'm still confused. I ended up buying a valve bank on Ebay that had 10 valves in one compact unit for about $150. While I waited for this to show, I went back to the mechanical and tentacle construction.
I originally planned on having a small 4-wheeled cart on 2 parallel tracks. But while wading through my favorite metal yard, I spotted a "T" shaped aluminum rail. I redesigned my idea on the spot and went for a monorail approach. The cart would get more complicated, but the overall design was simpler. This picture shows the monorail with 2 aluminum supports at each end. The (first) aluminum scissor mechanism, and the first several components of the cart being test fitted. The cart is made of 1" square steel tubing and flat steel. This was also my first foray into welding. I borrowed a small wire-feed welder from Donovan, bought leather gloves, leather apron, and a $50 auto-darkening helmet from Harbor Freight Tools and off I went. I'm now a total welding junkie and a welder is high on my tool wishlist. My advice for any other welding newbies, I think the auto-darkening helmet makes all the difference. My welds aren't pretty, but they are very functional. Here is a closer look at the cart, before it had the lifting cylinder in place. The cart was designed to convey the tentacle (via the scissor extender) and the (skateboard) wheels give it support in every direction.
And back to the pneumatics, I was really in the dark on proper sizing of the cylinders, tubing sizes, and pneumatic connector(hell). The scissor mechanism worked pretty well but required quite a bit of force to get it moving. I ended up buying (Ebay) a monster 3" cylinder with a 12" stroke for the scissor, and a 1" cylinder with a 6" stroke for the lift mechanism (FrightProps). FrightProps sells many pneumatic parts and they turned out to be my best off-the-shelf source for connectors, individual valves, and actuators. I researched procurement extensively but couldn't find a better selection and pricing (except for some items on Ebay, which were riskier.)
The mechanics were coming along now, and my (first) Ebay solenoid valve arrived. After much anticipation, I couldn't do anything with this device. It was in great condition, but the configuration of this particular device made it unusable. The connectors were all metric (couldn't source tubing in time) and small, but most important, the solenoids were a twin configuration. Meaning I would need twice the number of digital i/o ports on my controller to operate this thing. Even with all I've learned on air valves, I'm still not sure about the configuration on this particular unit. Time was becoming a factor now, I could order 9 individual valves from Frightprops, or I could try again on Ebay with another valve bank. I searched, researched, and ended up trying again on ebay. This time I bid on an 8 valve unit that looked older, but I was able to verify that it had 1/8" ports (for 1/4" tubing), single solenoids, set up for doubling acting cylinders, and it also had an air regulator on every valve! I won the auction and waited again. I did end up ordering one individual valve from Frightprops that I used for the up/down cylinder. This cylinder was only single acting, but with this 4 way valve I could throttle the exhaust to slow the descent (from gravity).
The full mechanism was coming together now, you can see the (skinned) tentacle, the big actuator connected to the scissor, and the scissor connected to the cart. The lift cylinder hadn't arrived yet. The scissor mechanism is steel now, as the big cylinder was so powerful it quickly destroyed my aluminum scissor. Even the steel scissor has been torqued, but I've got it tuned now and it is working well. I haven't addressed the structure in the tentacle yet. I wish I had a picture to make the description easier. Again the tentacle was a standard foam filled prop. I carefully skinned the tentacle, trying not to stretch or tear the skin. There are seams that run the length of the tentacle, they were not completely sealed in the first tentacle. But I got it all off intact. I then sliced the underside of the foam structure and carefully carved out the interior leaving enough foam to support the skin. My original plan was to have a "skeleton", some sort of flexible, yet non compressible structure down the center. But then I thought the rigid foam would be enough to maintain this function, almost like an exoskeleton. I made a series of panels from a plexiglass-like material I get at Tap Plastics. It is softer than regular plexiglass, but is easy to work and shape. The panels were glued into the tentacle with E6000 adhesive (I really like that stuff!) and spaced at regular intervals. The base air-muscles attached at the base panel, then connected to cables that extended through several more panels. The cables attached about 2/3 the way up into the tentacle. The finger air-muscles anchored about half way up into the tentacle, then attached to cables that went to the very tip. The base cables overlapped the finger air-muscles to give some continuity between the two sets of muscles. The cables were run through channels in the outside edge of the tentacle, supported in the panels. So the effect of contracting a muscle, pulled the cable on the outside edge of the tentacle, which was then pulling against a point further up in the tentacle causing that side to constrict. It works pretty well, though I had hoped for more flex than I got. It I did this again, I would go back to a central spine design.
The valve bank arrived, and this one was going to work. The individual regulators turned out to be a really nice feature. It is time to talk about how to control this beast. I'm using an Arduino controller (Diecimila) which handles the core logic for all the actuators, and also handles the trigger for the prop and a few other inputs and outputs. There is also a higher level user interface program that was supposed to run on an old touchscreen tablet that I have making for an easy-to-use test and control interface for the tentacle. That was written in Processing. This was my first project with the Arduino controller. I've used other controllers in the past but this one has so much supporting hardware and software it is easy to use. I used Processing for the GUI as it uses a very similar programming environment and language syntax with the Arduino. But likely next time, I'll just do a web interface that talks directly to the Arduino. I used the proto-shield for the arduino to add the driver circuits from the digital I/O to the solenoids. They needed about 6W each and I added in diodes to the connector on each solenoid to protect from inductive spikes. I'm using a I/R detector from Parallax to trigger the tentacle into action. This was mounted above the "Object of Great Desire", as we came to call it. It was a metal object d'art with a Blinkm LED unit inside glowing and changing colors. If you touched the object (just needed a hand near) , the tentacle came to life, presumably guarding the object.
There is much work to go in programming the tentacle. I've programmed several canned routines but want to capture more interesting motion. In watching the tentacle move, it has a few moments of complex motion that are really nice. I think I can get more of this if I have a better way interact with the tentacle, maybe through a joystick. I also plan to add several servo controlled or proportional valves to be able to vary the air flow. I'm doing really primitive pulse width modulation on the lift and forward/reverse actuators, but plan to program PWM capabilities for any actuator -- that may help to make the motion more analog.
Two videos, the first is a series of snippets of The Tentacle in action at Pumpkin Prowl. The second includes behind-the-scenes views of the tentacle mechanism in action.
 Two fellow martini drinkers taught me to appreciate a classic Bombay Gin martini -- the gin had to come straight from the freezer. Oh so dry. Two olives and an onion..... So when it came to creating pumpkin martinis, I needed something that would appeal to me as I'm just not into sweet drinks.